Google TV gives the new Chromecast a home screen full of curated content from your various streaming subscriptions, but it's just that — a home screen app. Underneath, Google's new dongle is running Android TV, meaning its home screen is just a launcher that can be installed on countless other TVs and set-top boxes.
This new interface may eventually become available to other Android TV devices like the Nvidia Shield, Mi Box, and Sony TVs, but until then, you can sideload it. You'll have to use a computer to send an ADB command to the TV, but that process has gotten so streamlined lately that it's practically point and click.
What You'll Need
- Android TV device running Android 9 or higher
- Windows, Mac, or Linux computer or Android phone
Sideload LauncherX & Google Base
On your computer or Android phone, start by downloading LauncherX. This is the actual home screen app, extracted from the new Chromecast, that gives it the Google TV UI.
Next, you'll need a supplemental app called Google Base that makes the search feature in Google TV possible. This was also extracted from the new Chromecast, so download the APK at the link below — again, either on your computer or your Android phone.
Now, you'll need to sideload both files onto your Android TV device. Here's a short guide for that:
- Upload both APK files to Google Drive.
- Install File Commander from the Play Store on your TV.
- Add your Google Drive account to File Commander.
- Click the APK to download, then open it.
- Click "Settings" on the popup, then enable the "Install other apps" permission for File Commander.
- Return to Google Drive in File Commander.
- Click the LauncherX APK again.
- Click "Install" on the prompt.
- Return to Google Drive in File Commander.
- Click the Google Base APK.
- Click "Install" on the prompt.
If this is your first time sideloading apps on Android TV, or if you'd just like a little more help with this part, check out our full tutorial below:
- More Info: How to Sideload Apps on the New Chromecast
Enable Developer Options
On your TV, you'll need to activate the hidden Developer Options menu next. For most devices, head to the main Settings list, choose "Device Preferences," then "About." You may find the "About" menu in a different location on some TVs.
Once in the "About" menu, scroll down and highlight the Build listing. Now, press OK or Select on your remote 7 times in rapid succession. It's like you're clicking the build number over and over quickly. When done correctly, a toast message will say "You are now a developer!"
Enable Network Debugging (Or USB Debugging)
Now, head into the newly unlocked menu by going to the Android TV Settings list, choosing "Device preferences," then scrolling all the way down to the bottom and selecting "Developer options."
Here, enable the switch next to "Network Debugging" about halfway down the list. After 5 or 10 seconds, the text beneath the "Network Debugging" label should change to say "Enabled on" and then an IP address. Take a picture of this IP address, you'll need it later.
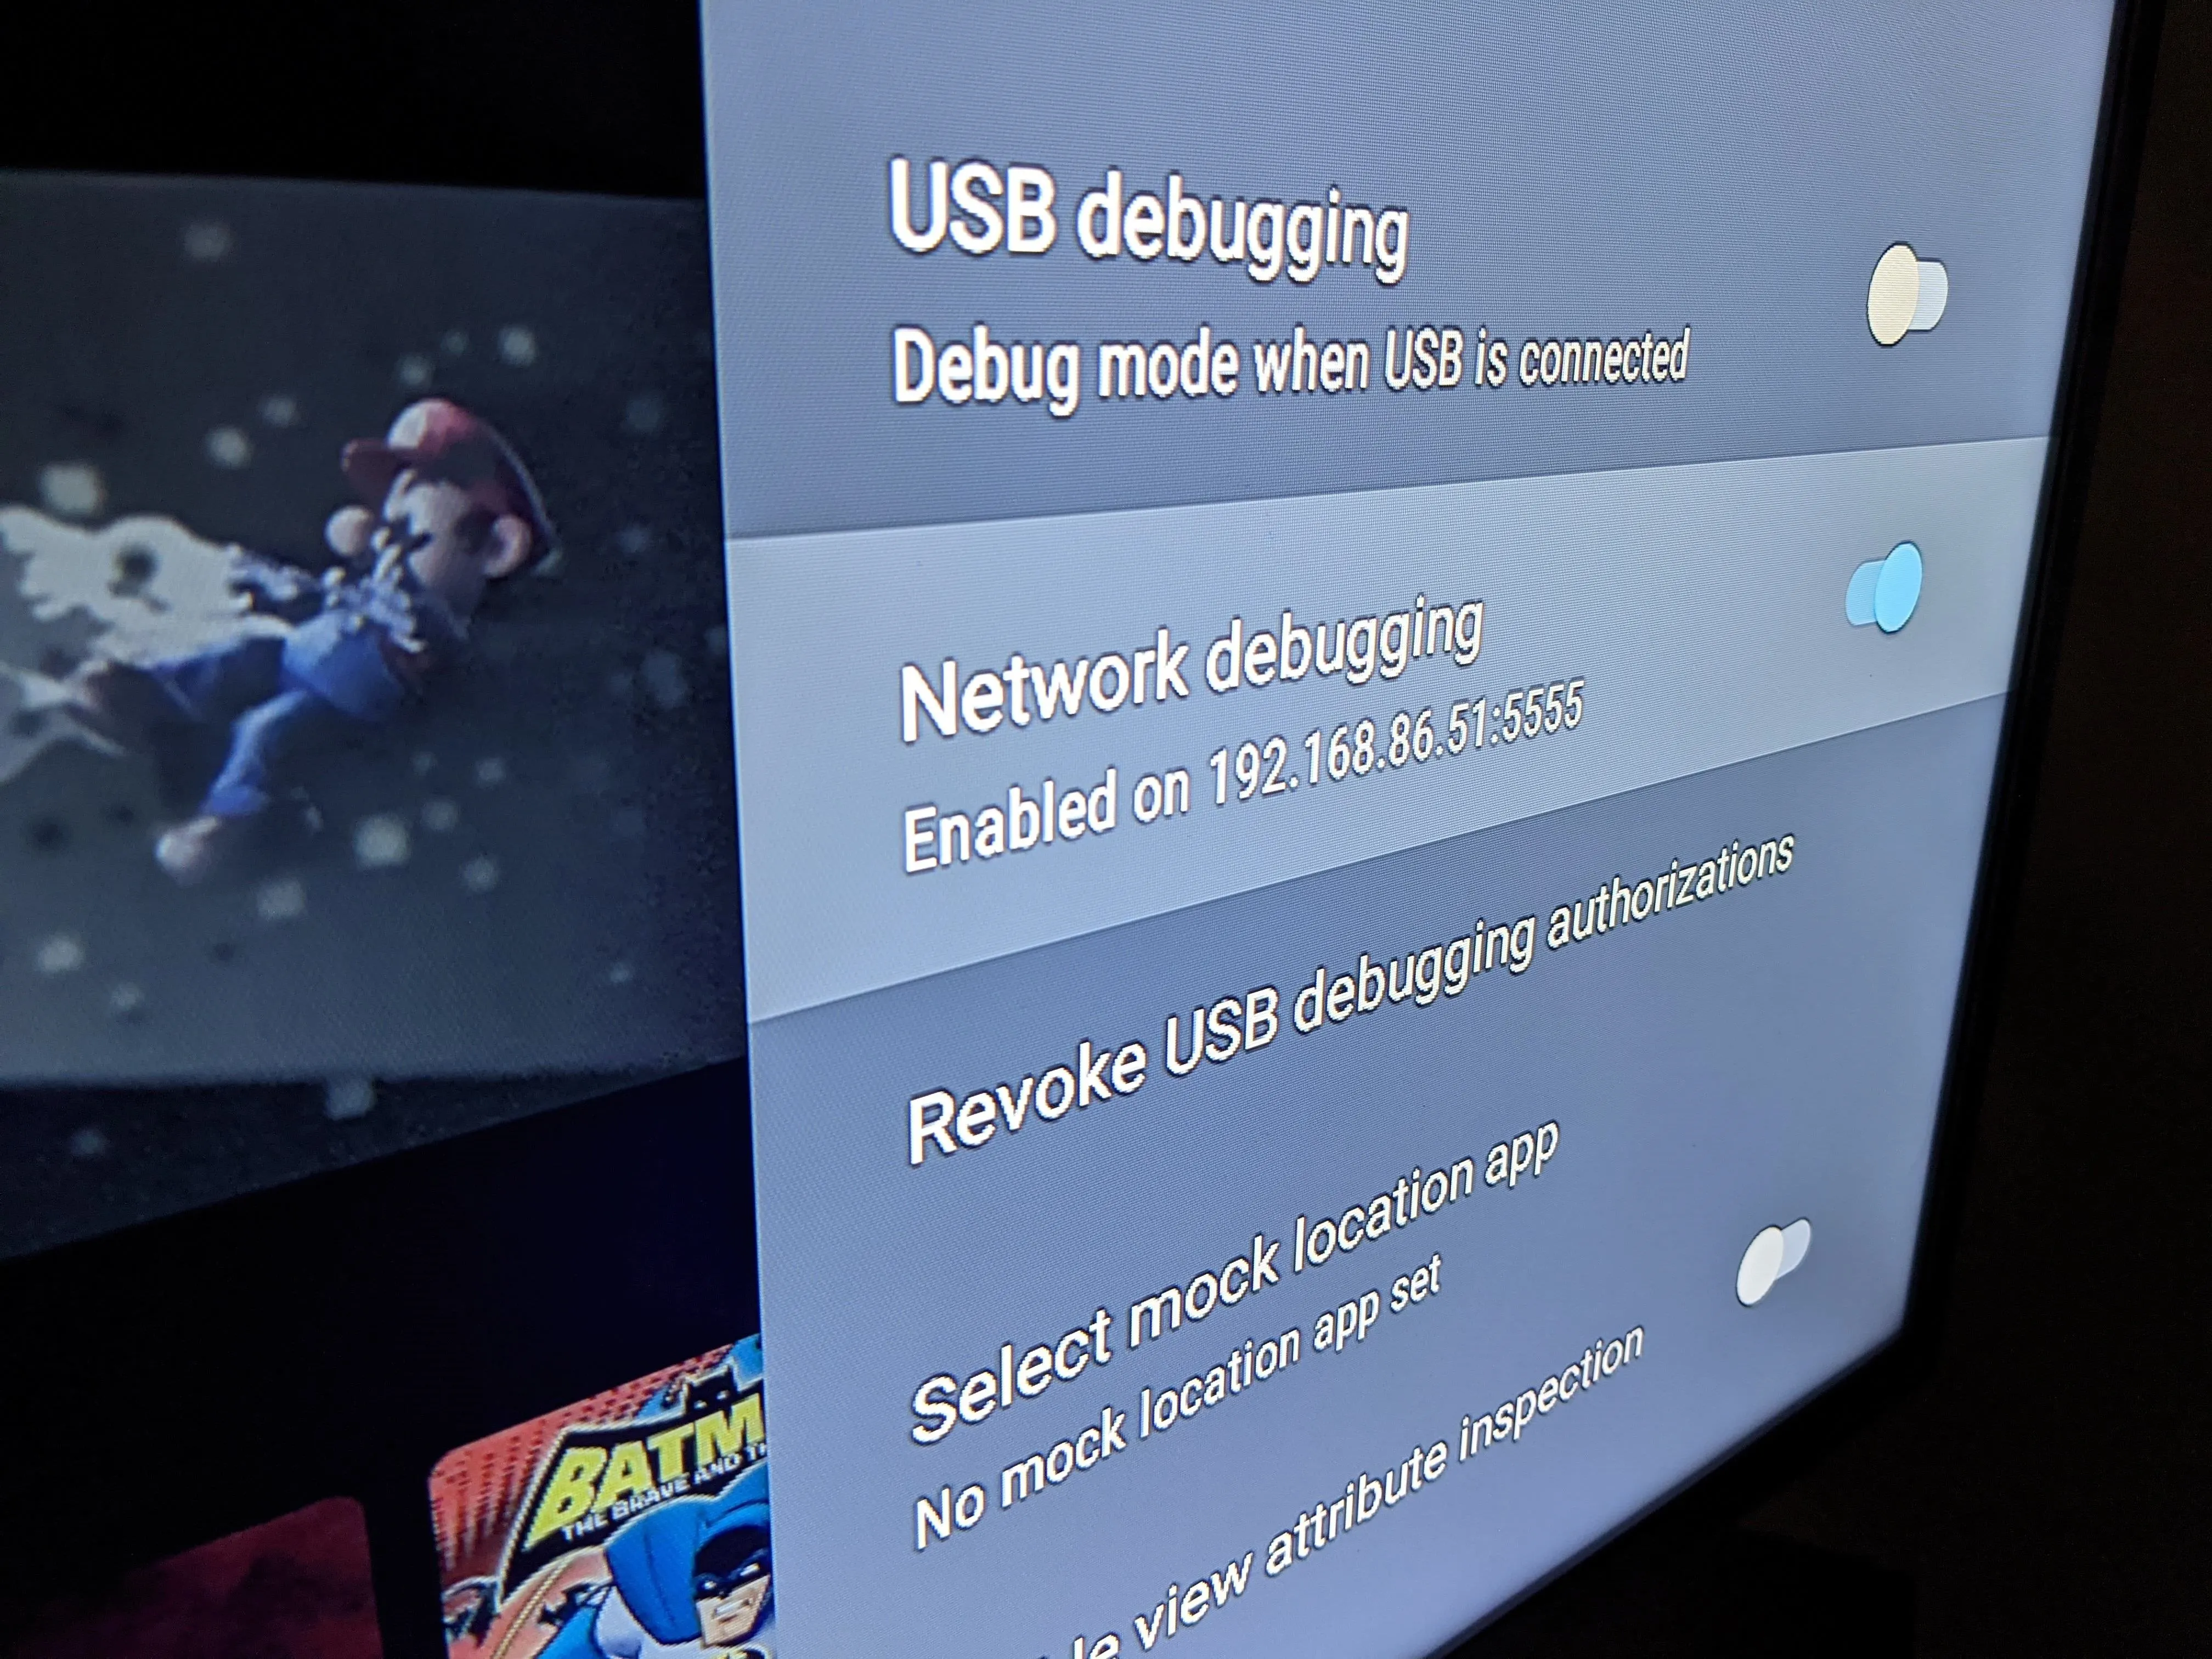
Some devices may not have the wireless debugging option, in which case, you'd have to enable "USB Debugging" (also in Developer Options) and connect your computer to your TV or set-top box with a USB cable.
Get ADB Software
Android Users with Network Debugging
If you have an Android phone and you were able to use Network Debugging instead of USB Debugging in Step 3, you can install Remote ADB Shell and skip ahead to Step 6.
iPhone Users (Or Android Users Without Network Debugging)
If you don't have an Android phone, or if your Android TV didn't have the Network Debugging option, download Google's Platform-Tools on your computer. This is a small, first-party ZIP that contains files that will allow your computer to communicate with your TV or set-top box using ADB commands.
Once downloaded, extract the ZIP to your desktop. You'll want to place the platform-tools folder directly on your desktop.

Open a Command Window in Platform-Tools
If you're on Windows, press the Windows button on your keyboard, then type "cmd" and hit enter to open a command prompt window. If you're on Linux or Mac, simply open the "Terminal" app.
Now, type cd in the prompt, then add a space, but don't hit enter yet. Instead, drag the platform-tools folder you extracted from your desktop, then drop it right on top of the command window. This will populate the folder's location. When it does, hit enter.

Get ADB Going
Android Users with Wireless Debugging
If you were able to use Wireless Debugging and you installed Remote ADB Shell on your Android phone, open that app, then type the IP address from Step 3 into the first field, ignoring the colon and numbers after it (e.g., :5555). Leave the second field set to "5555" and hit "Connect." You can now skip ahead to Step 7.
iPhone Users (Or Android Users Without Wireless Debugging)
Alternatively, if you had to use USB Debugging in Step 3, go ahead and plug your computer into your TV or set-top box. Or if you were able to use Wireless Debugging, but didn't have an Android phone, make sure your TV and computer are on the same network.
From there, type the following into the command prompt:
adb connect <IP address>Replace
If you're on Linux or Mac and receive a "Command not found" error after sending the above command, you'll just need to resend it with a period and a slash at the beginning. So copy and paste the following command, replace the IP address with yours, then hit enter and you should see the Failed to authenticate error.
adb connect <IP address>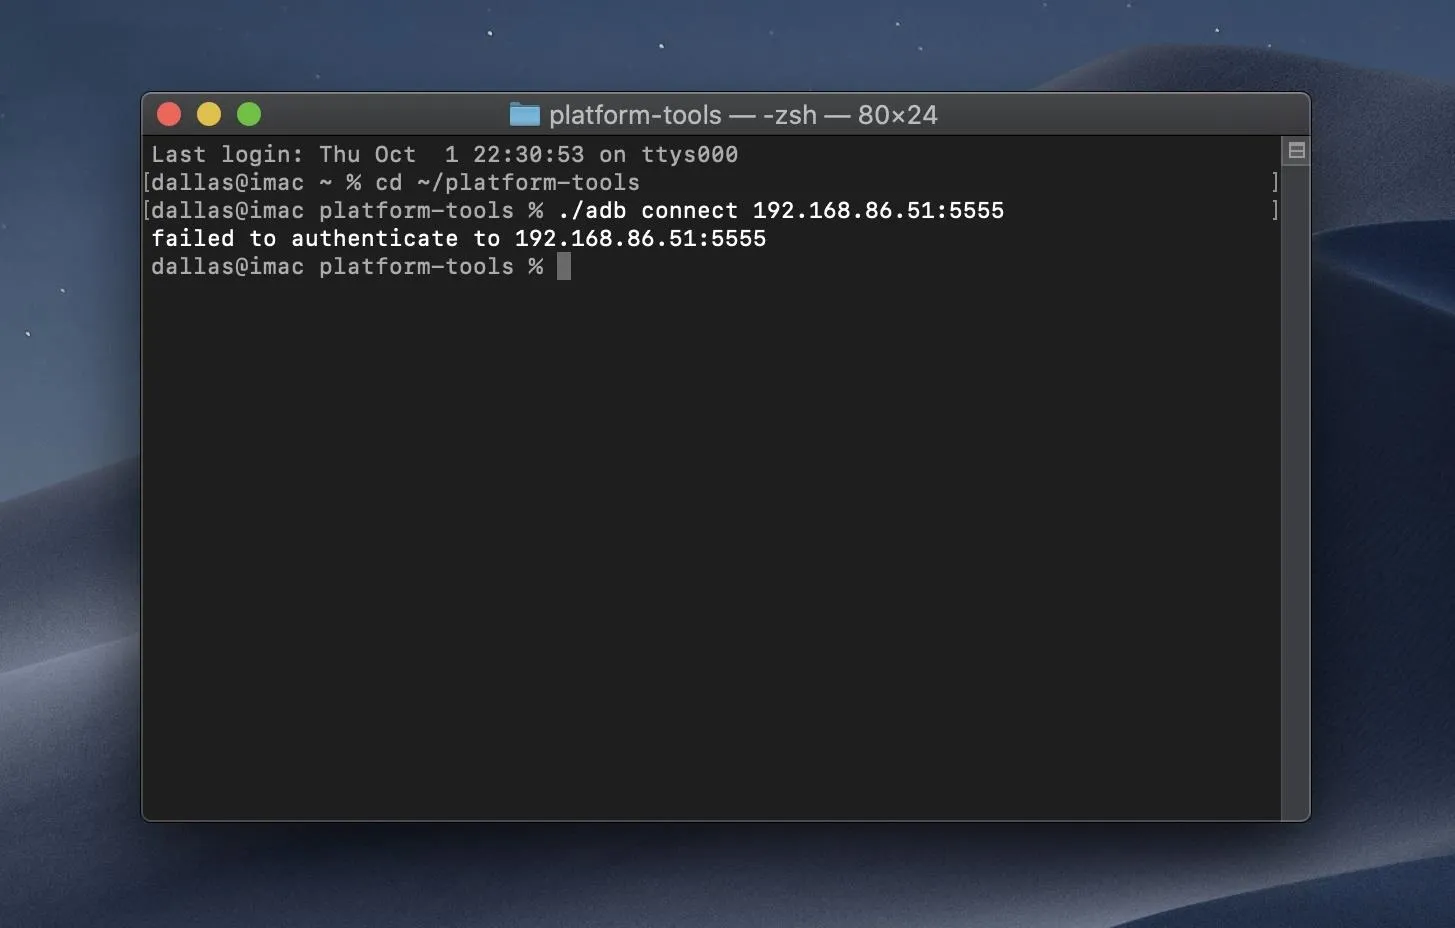
"Failed to authenticate" sounds bad, but it's a good thing. It means your command window is working as it should, and ADB sees the TV on your network, but you just haven't allowed the connection yet.
Authorize Your Computer or Android Phone
Over on your TV, you should see a popup at this point. Use the arrow keys to highlight the checkbox next to "Always allow from this computer," then press OK or Select on your remote to enable it. Once enabled, choose "OK" on the prompt.
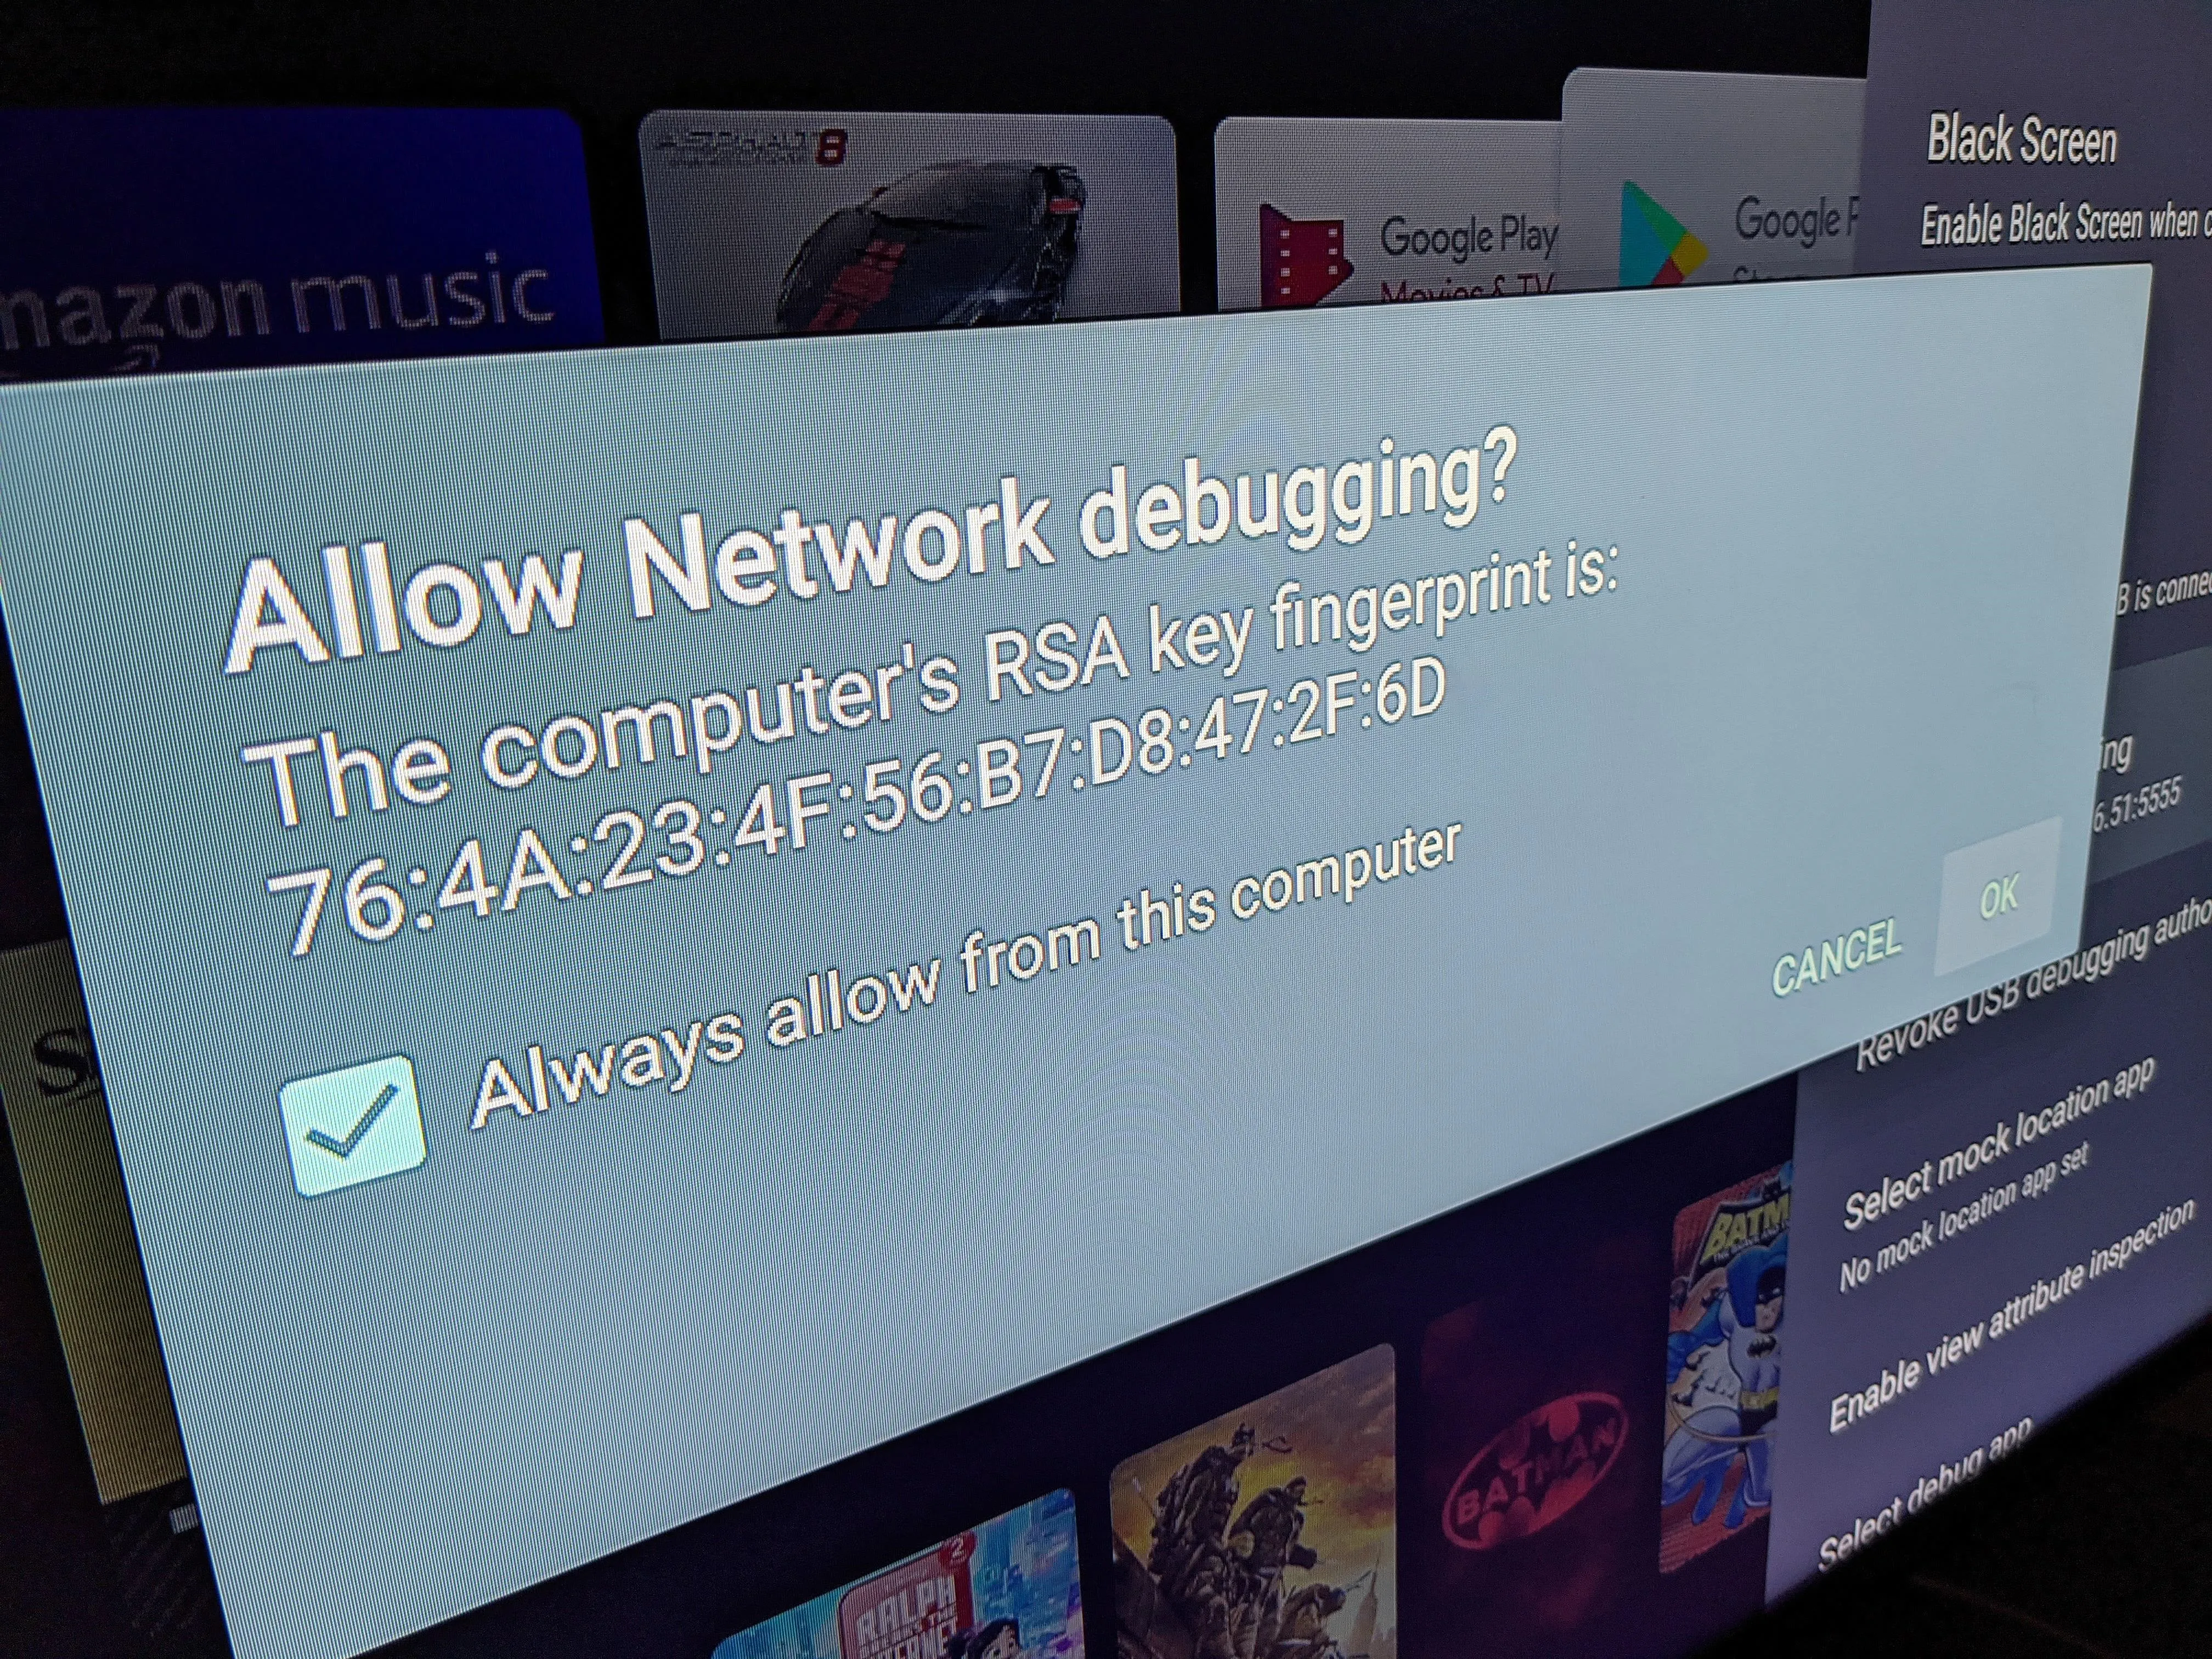
If you're using Remote ADB Shell on Android, you're good to go now. For everyone else, there's a tiny bit more to this step.
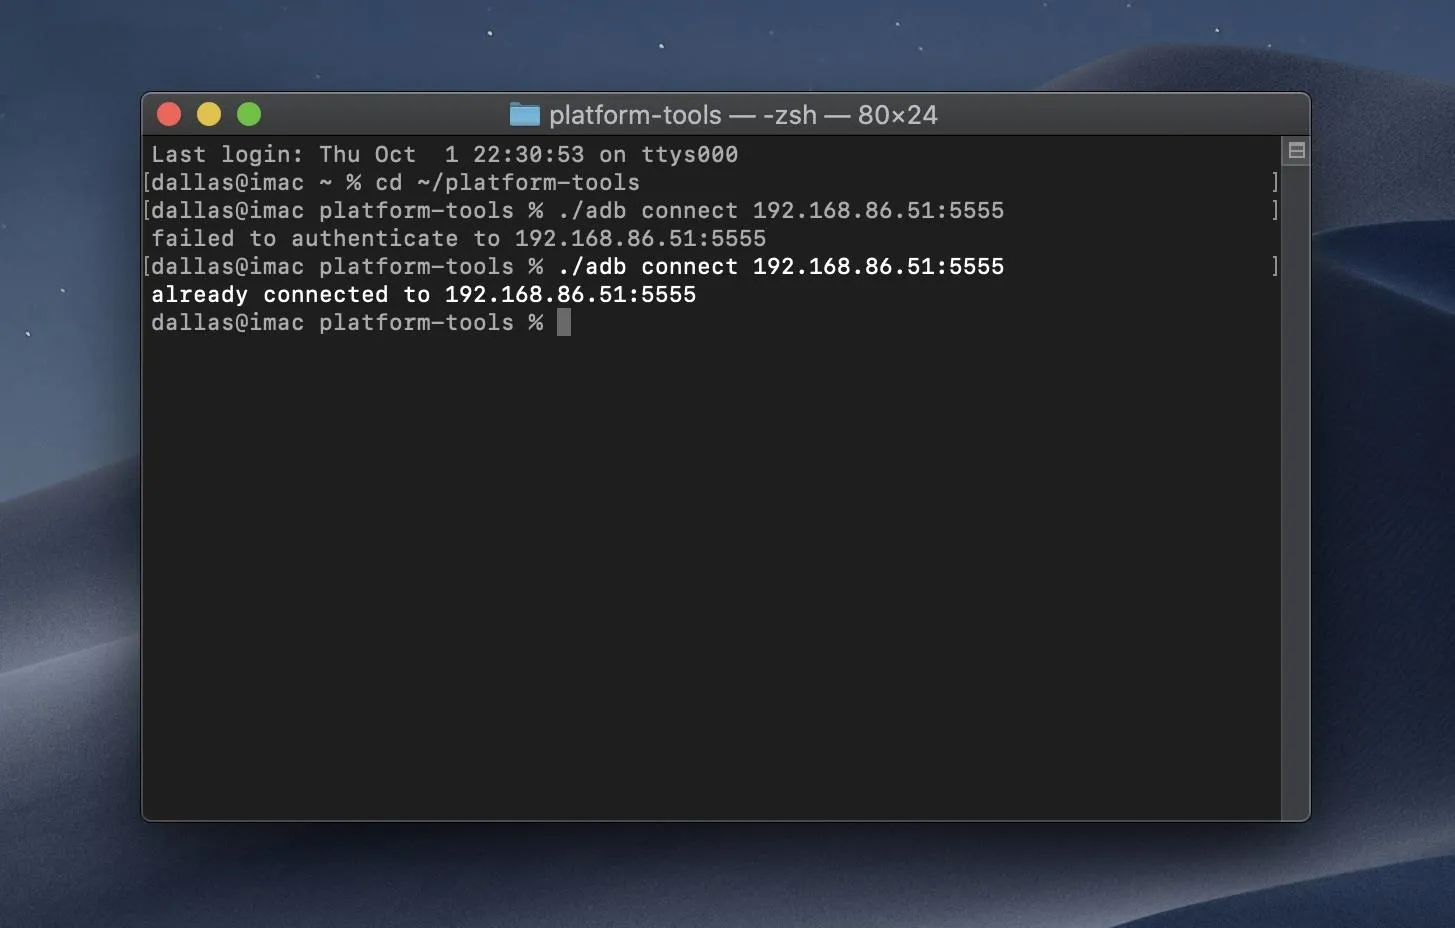
Back on your computer, click the command window once to make sure it's selected, then press the up arrow on your keyboard. This will repopulate the last command you sent so you don't have to retype it. So when you see the "adb connect" command again, press enter and it should say Connected or Already connected.
Disable the Stock Home Screen App
Android Users with Wireless Debugging
If you're on Android with Remote ADB Shell installed, copy and paste the following command into the field at the bottom of the app's main screen, then hit enter. The terminal should return a "Success" message, meaning you're ready to move ahead to Step 9.
pm uninstall --user 0 com.google.android.tvlauncheriPhone Users (Or Android Users Without Wireless Debugging)
If you weren't able to use Remote ADB Shell for Android or if your Android TV didn't have the Wireless Debugging option, copy the following command and paste it into the command prompt on your computer. Go ahead and hit enter, then almost immediately, the terminal should return a "Success" message.
adb shell pm uninstall --user 0 com.google.android.tvlauncherIf you receive the "Command not found" error, re-send the command with a ./ at the beginning and you should get that "Success" message:
./adb shell pm uninstall --user 0 com.google.android.tvlauncherIf you're still having problems, you may need to install ADB drivers on your computer. Check our full guide below for troubleshooting steps to get ADB connected.
Make Sure Google TV Is the Default Launcher
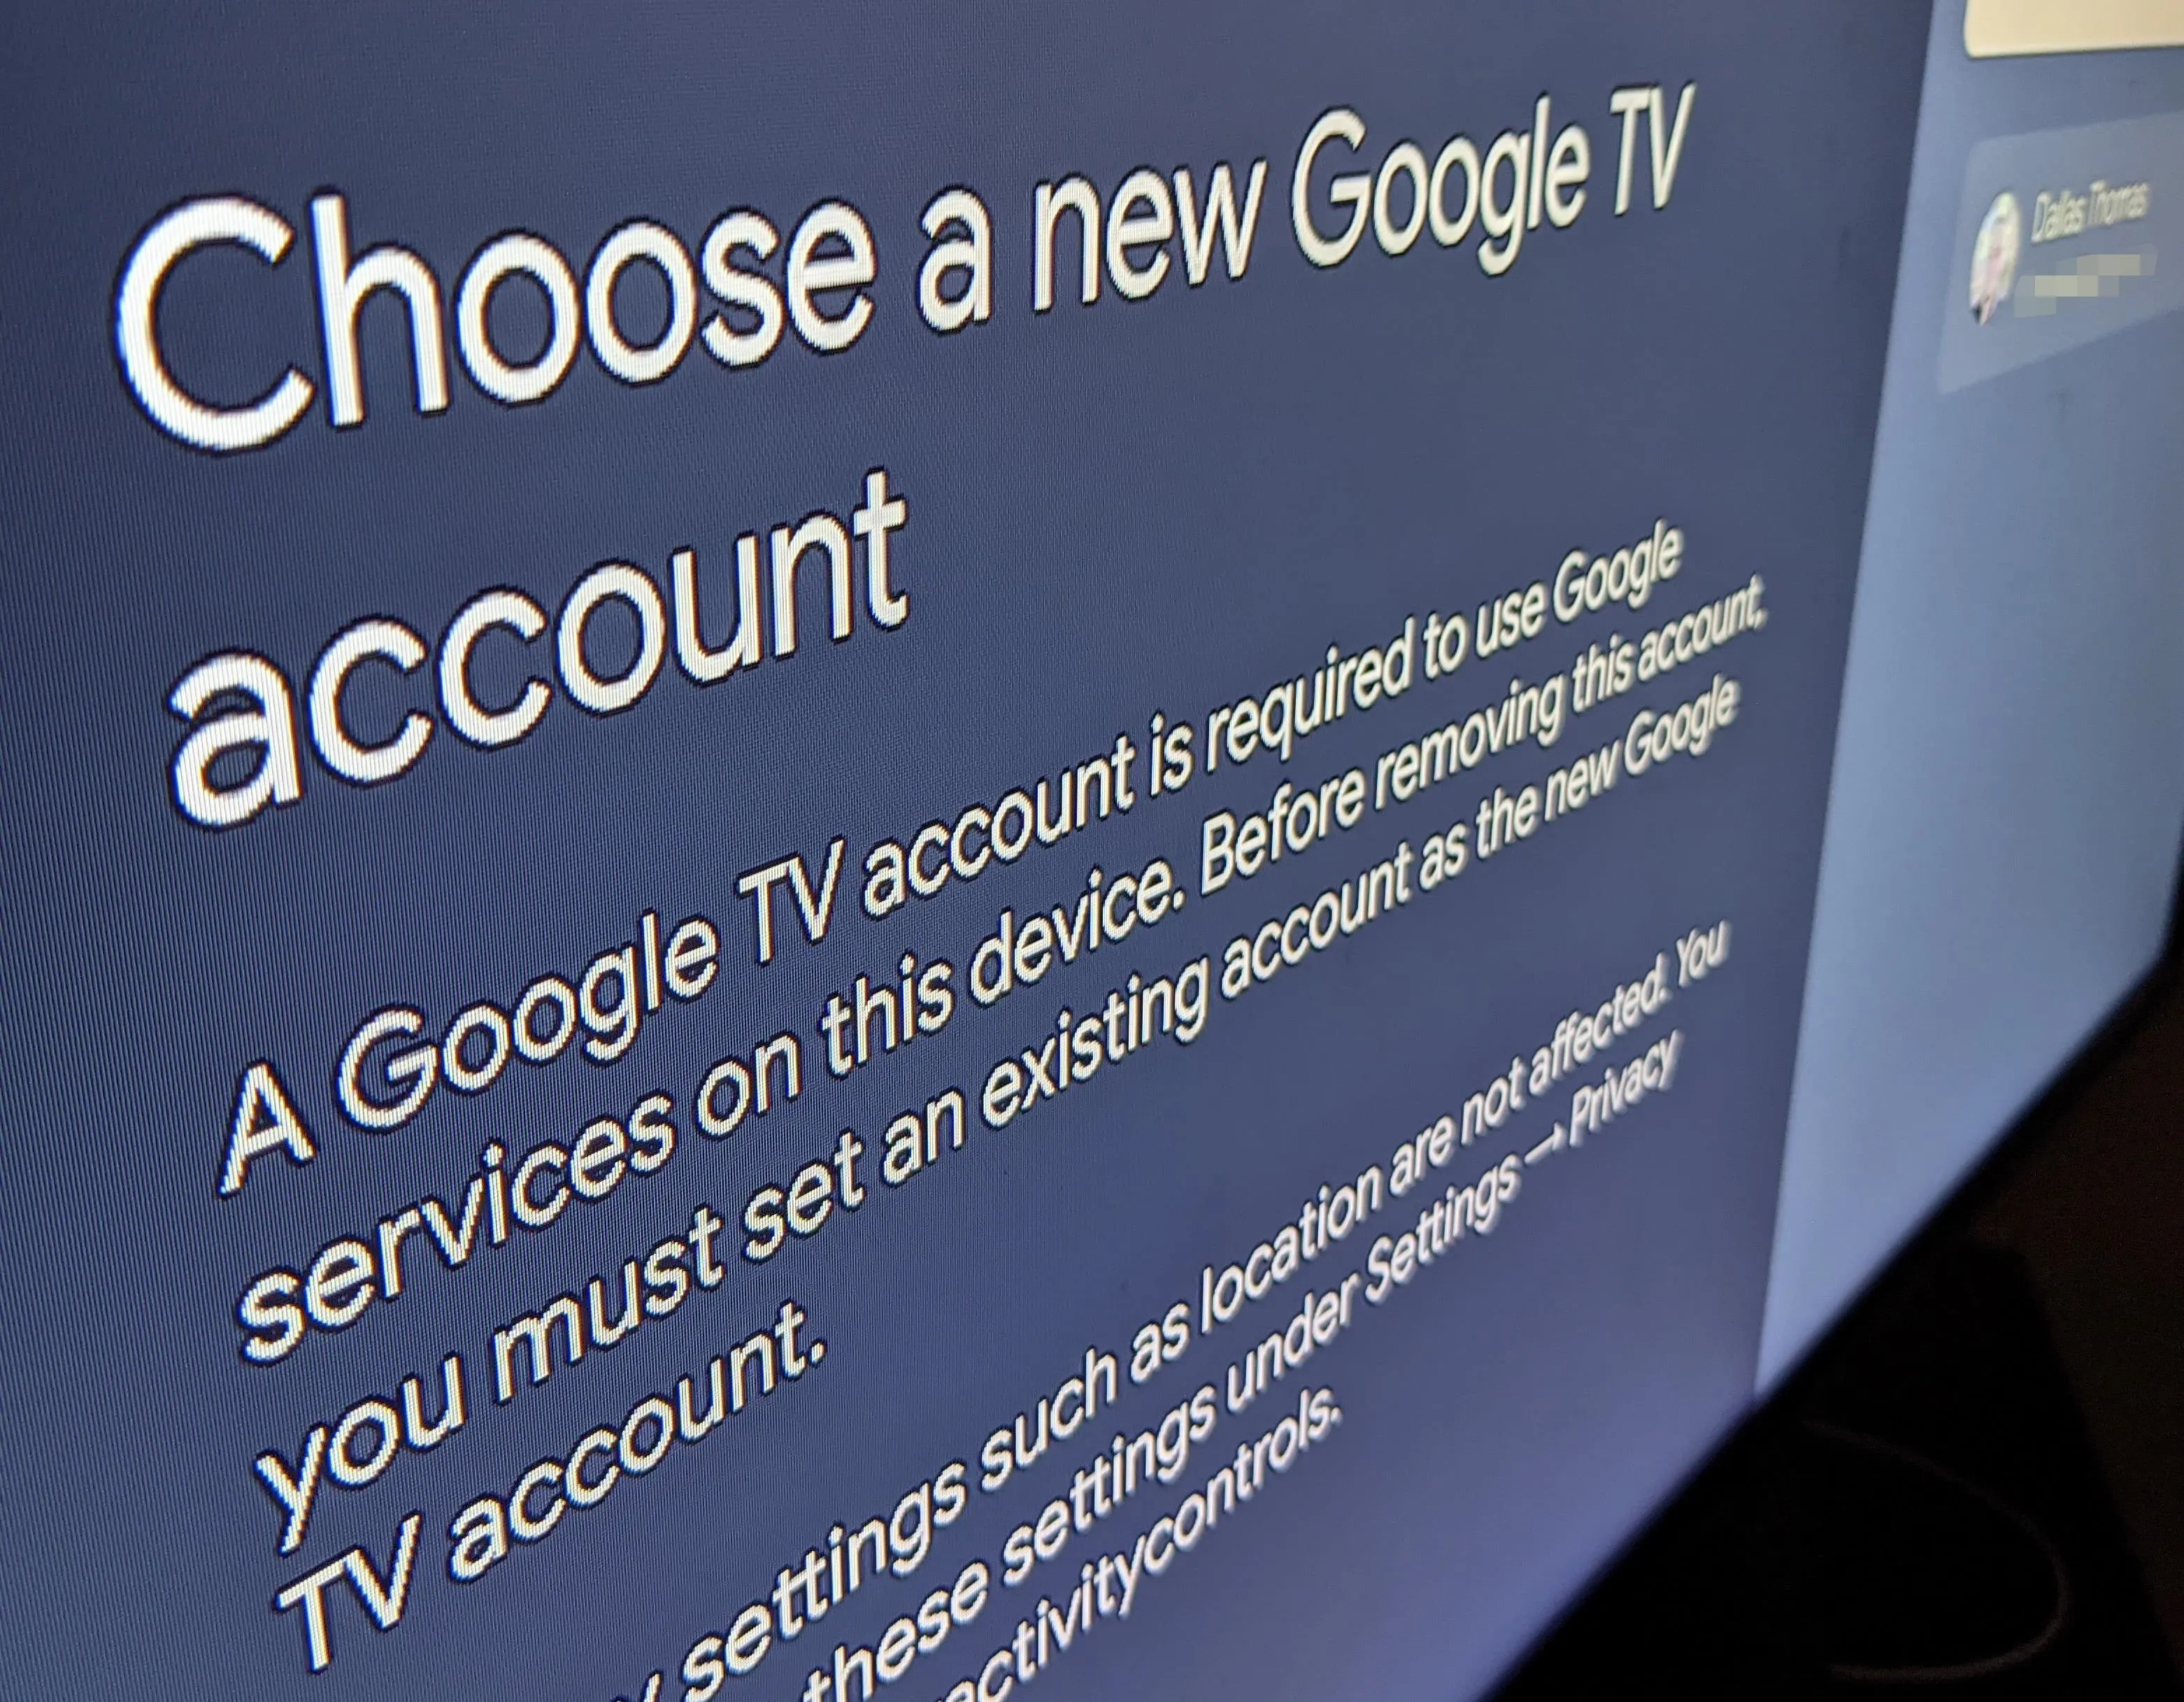
Now, press the home button on your remote and you should be greeted by the Google TV setup wizard. If not, you'll see a prompt — select "TV Home" and choose "Always" to make it your default home screen app, then you should see the Google TV setup prompt.
Enjoy Google TV!
Now you're all set to play around with the next-gen UI. Your home screen is the For You tab, which starts with a "Top picks for you" row, followed by a customizable row of your top 12 apps and an all apps button. As you keep scrolling down, you'll start to see why it's so nice — the recommendations are certainly numerous, and if you're a regular Google user, they're spot-on too.
For YouTube TV users, the Live tab is basically an integrated version of your live TV guide. The Movies and Shows tab are a lot like For You, just filtered by type of media.
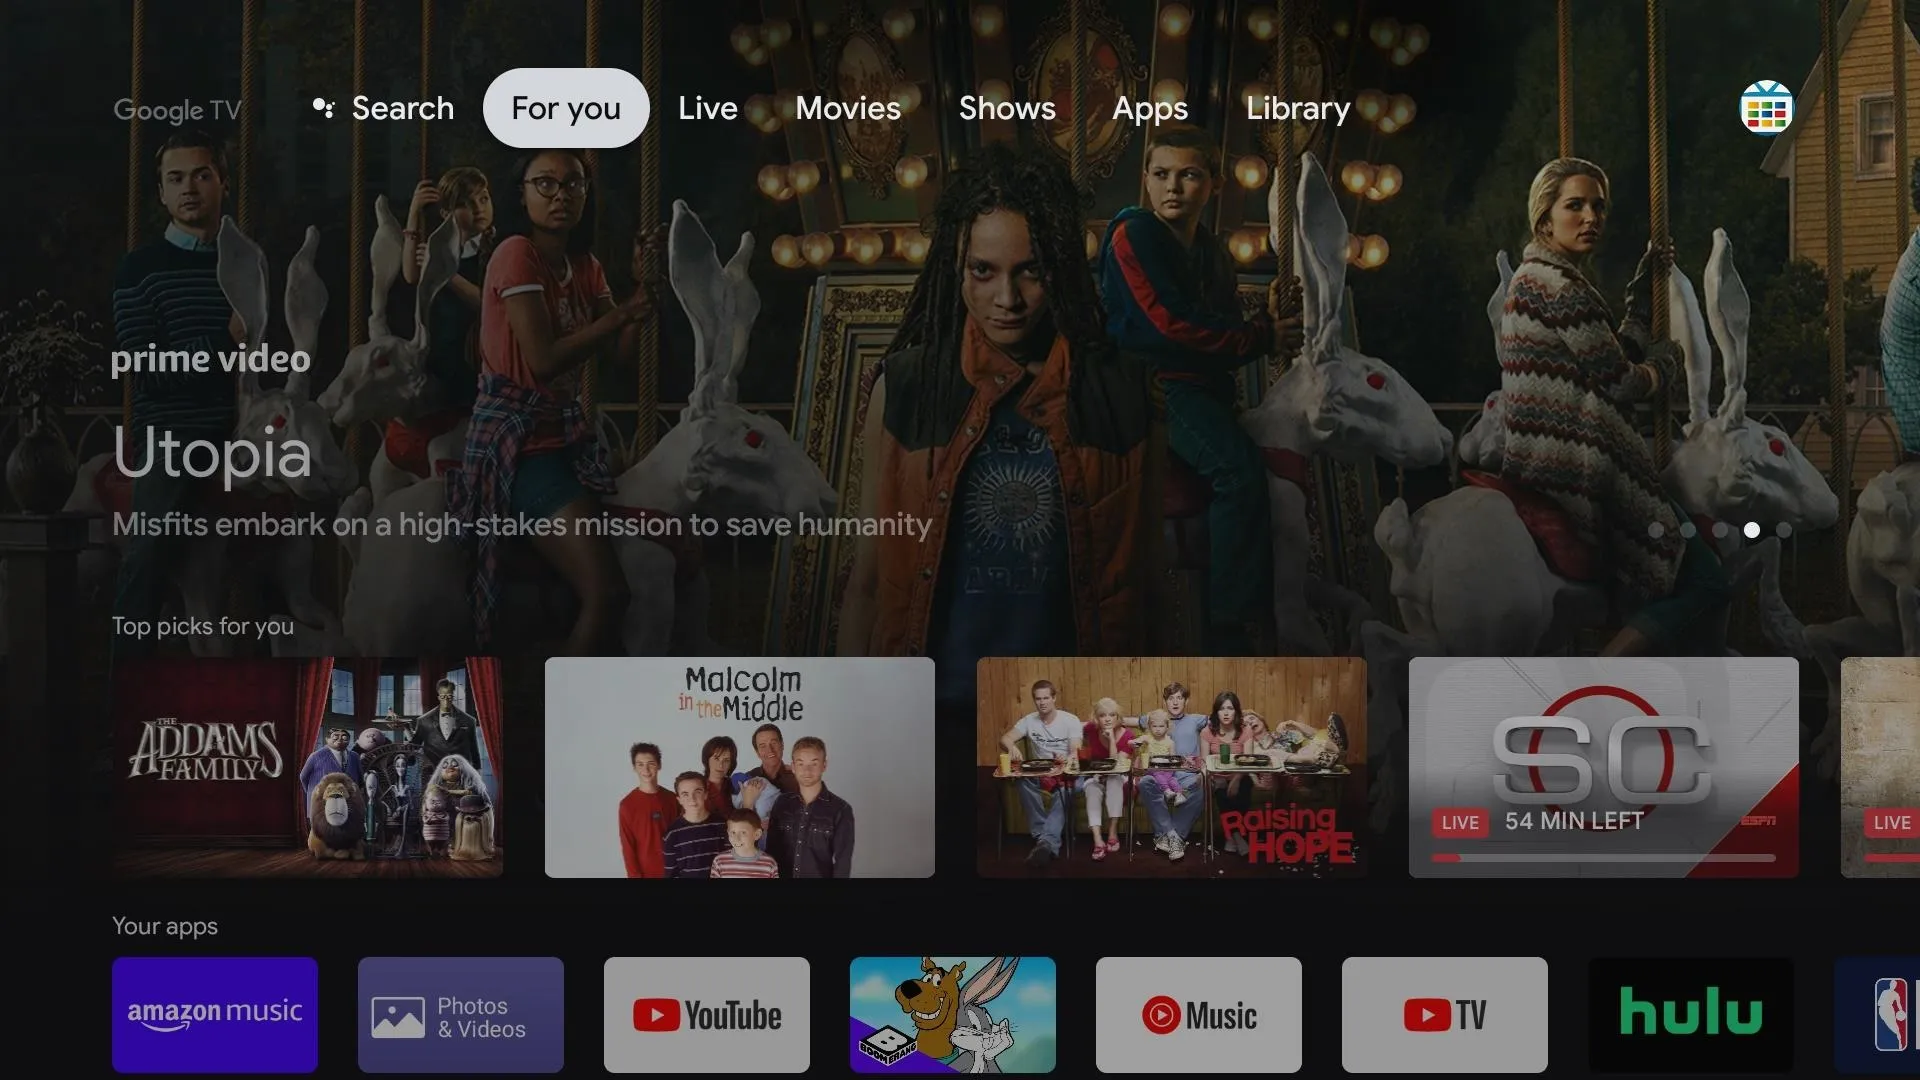
You'll notice some minor glitches like the Search tab sometimes kicking you back to the For You tab after a janky animation. LauncherX may be dependent on additional apps from the new Chromecast for some functionality, so I'll keep tinkering with sideloading software and update this page if I find any fixes.
Reverting to the Old Home Screen
If you decide you want to go back to your TV's old launcher, repeat Steps 5 and 6 to get ADB back up and running, then send the command listed below. Afterwards, just press the home button on your remote and the Google TV interface should be gone.
adb shell cmd package install-existing com.google.android.tvlauncherCover image, screenshots, GIFs, and photos by Dallas Thomas/Gadget Hacks







Comments
Be the first, drop a comment!